An Easy Way to Segment Data
So, you’ve set up your Google Analytics, and you are ready to start collecting data. You’ve seen the standard layout of analytics; you know where you can manage the data you need, so why even dive into the world of goals and attribution? What even are goals and attribution?
A Goal – Goals are used to track when users complete a specific action on your website. Usually, these are targeted to measures that would benefit your business. Things like sales and sign-ups are every day, but they don’t have to stop there. You can set up a goal for any action you want a user to take.
Attribution – This is the act of assigning the source of your user. You can use different tactics to determine where people came from, and this data can be used to determine where you should put your future efforts.
Using destination goals is an easy way to segment traffic, even if you are new to Google Analytics. This will help you get actionable data that you can use to produce more leads and evaluate the efforts you place into the user experience.
Think About the Consumer Pathway
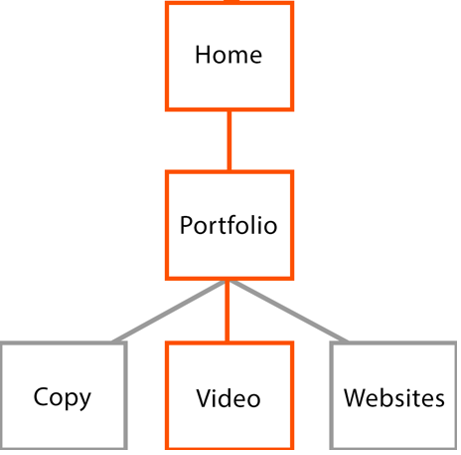
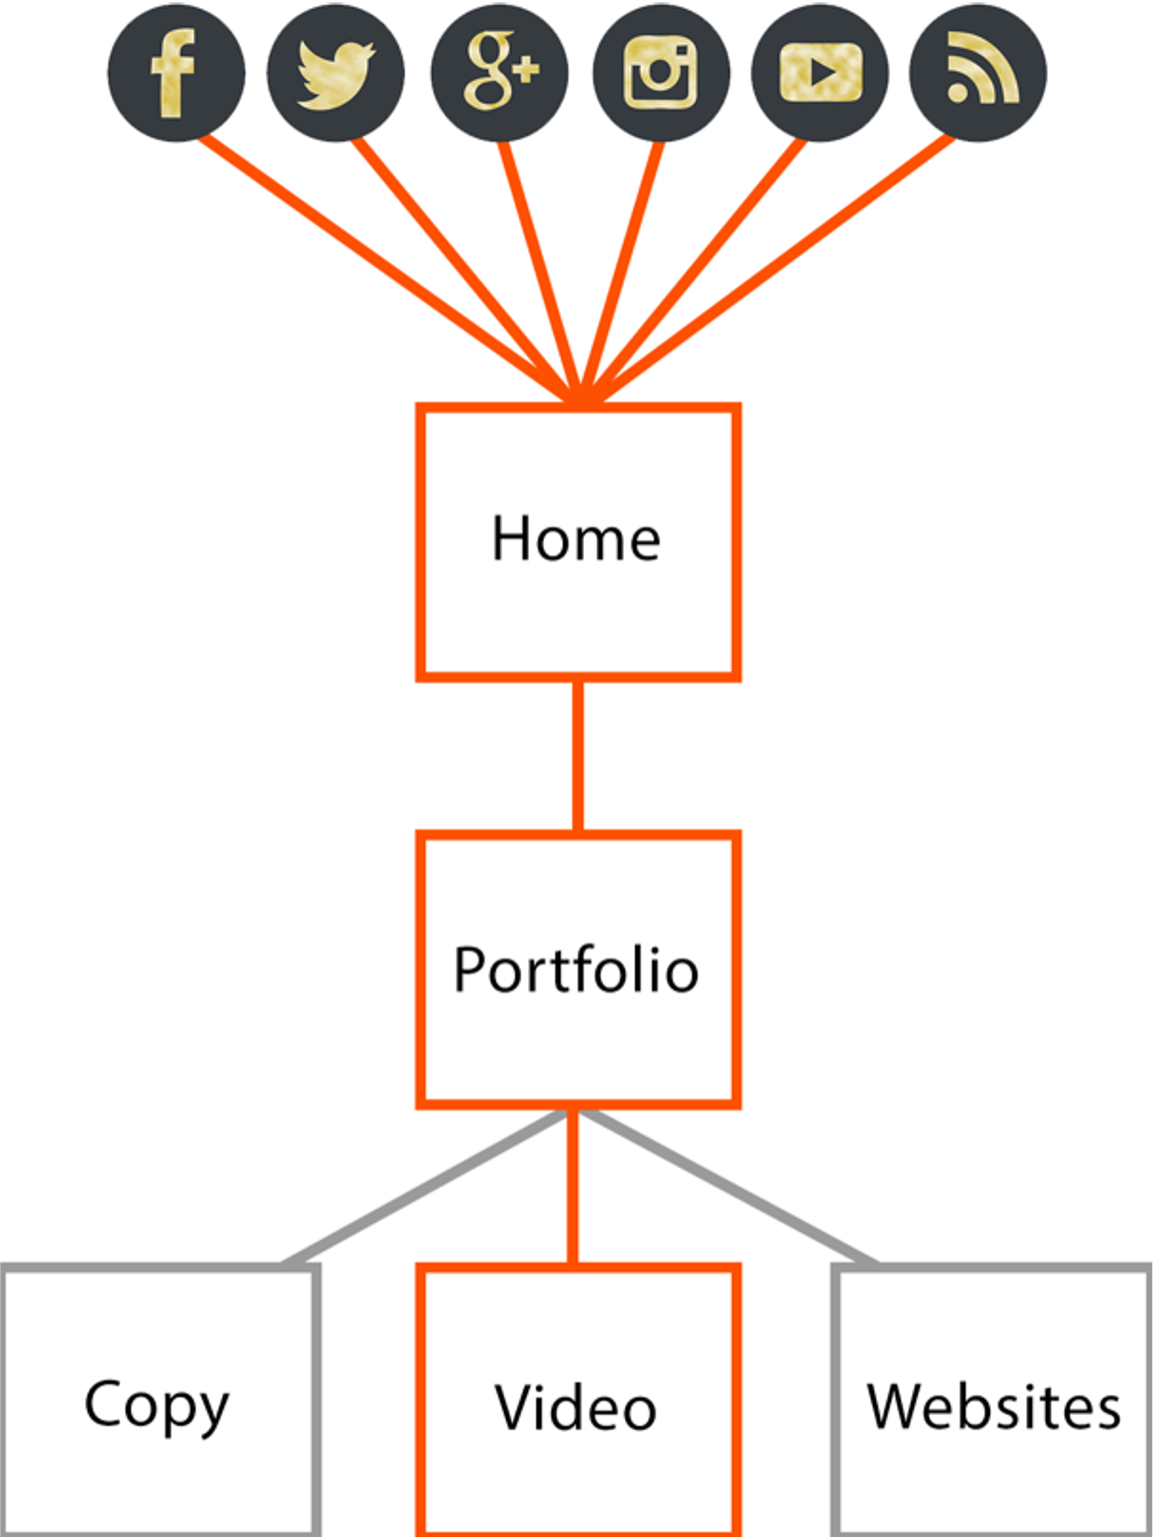
Let us just use a basic portfolio website for this example. Let’s set up a destination goal to see how many people make it to the video production section of the portfolio. On a basic webpage, the funnel is going to look something like this.
How to set up a goal:
Goals are built into Google Analytics, but they can be complicated for the uninitiated. First, let’s get you into goal set-up.
From the Google Analytics home page:
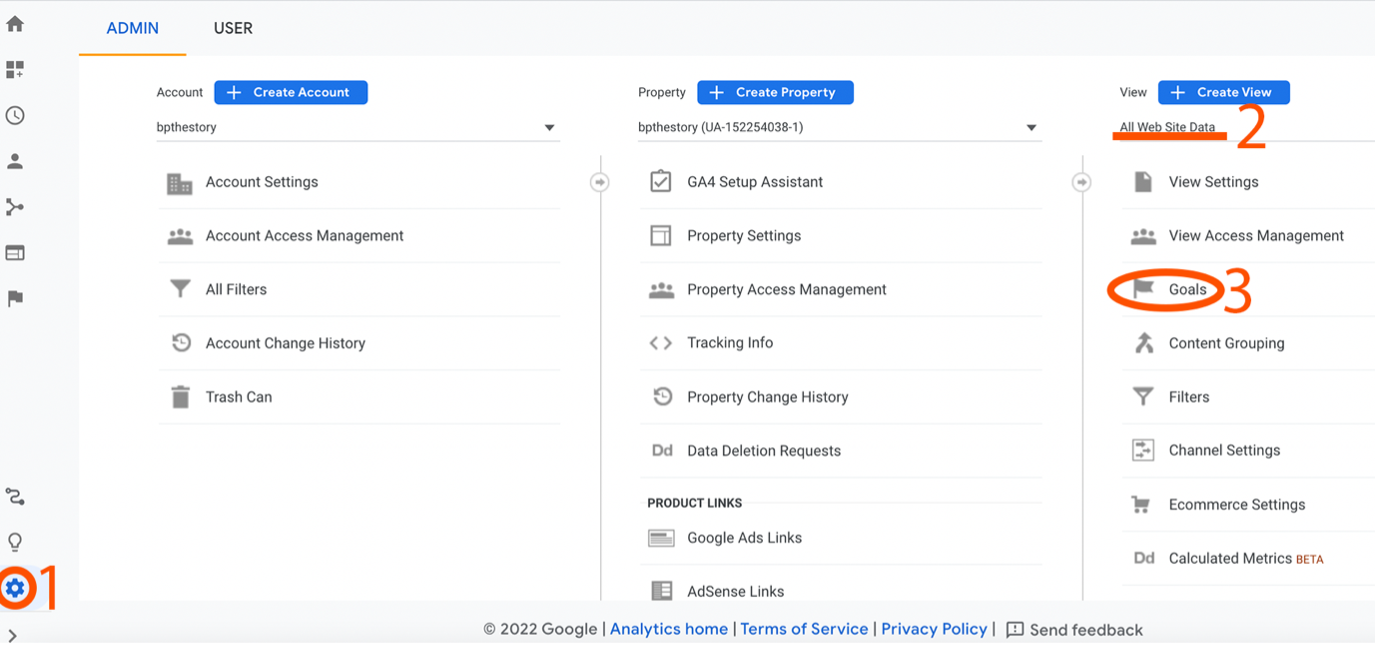
Click Admin -> All Website Data -> Goals
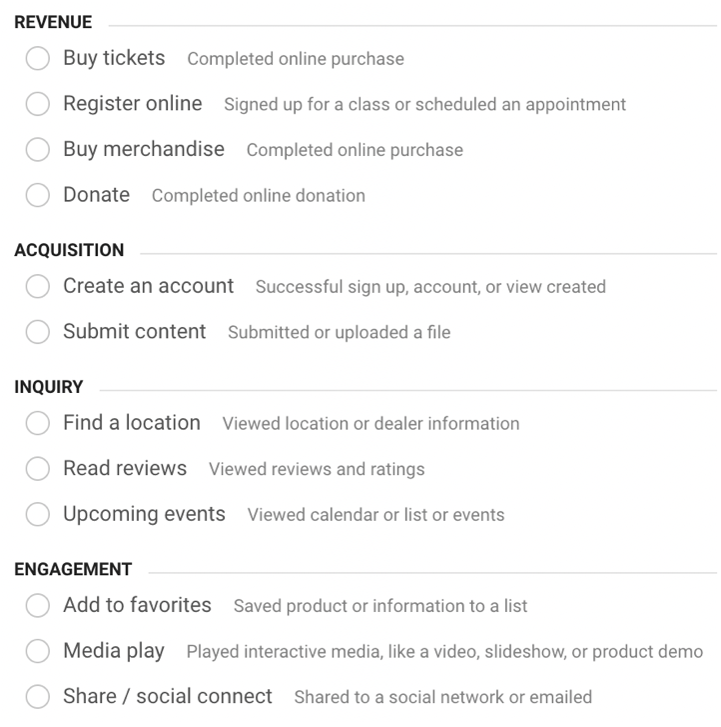
Select “New Goal,” and you’ll see a list of commonly set goals broken down into four categories.
There are many ways you can set up goals, each with different purposes and actionable insights, but we will set up a simple destination for this example.
For this example, let’s set up a goal to track how many people visit the video production page of this site.
Let’s start with a few definitions –
Destination – This is the last page the user will see. It could be a checkout page, a “thank you for signing up,” or something as simple as a page you would like your users to see.
Value – The value is used to determine a financial worth assigned to a goal completion. There are many reasons you would want to use this, but we will leave this off because there is no financial value to getting to this page.
Funnel – This is used to determine each person’s steps to get to the end goal. This can also be used to determine attribution with a few additional steps.
All right, let’s get to the setup.
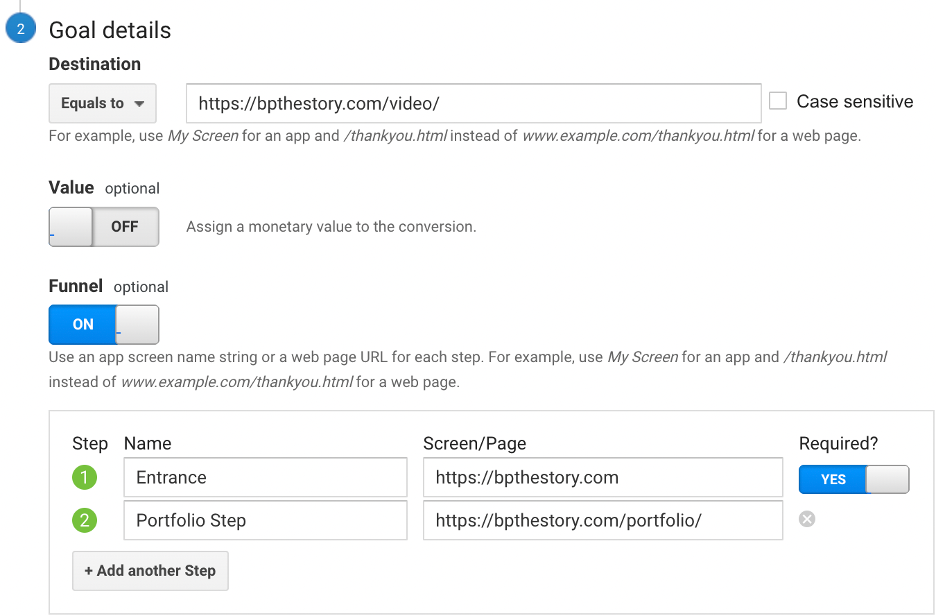
Step 1 – Determine the last page.
Here we will use my video production page as the final goal. That is bpthestory.com/video.
Step 2 – Determine the pathway (optional)
If we specify the pathway on the goal, it will only track sessions that follow it. This is best used for sales funnels, as you can track each process step. This will inform you where people might be abandoning their cart or the barriers they find to signing up for your services. This step is required if you are using destination goals to assign attribution.
Step 3 – Verify the Goal
This step ensures the goal is working and will track the information correctly. It may not always be possible to verify a goal completion, but if you can, you always should.
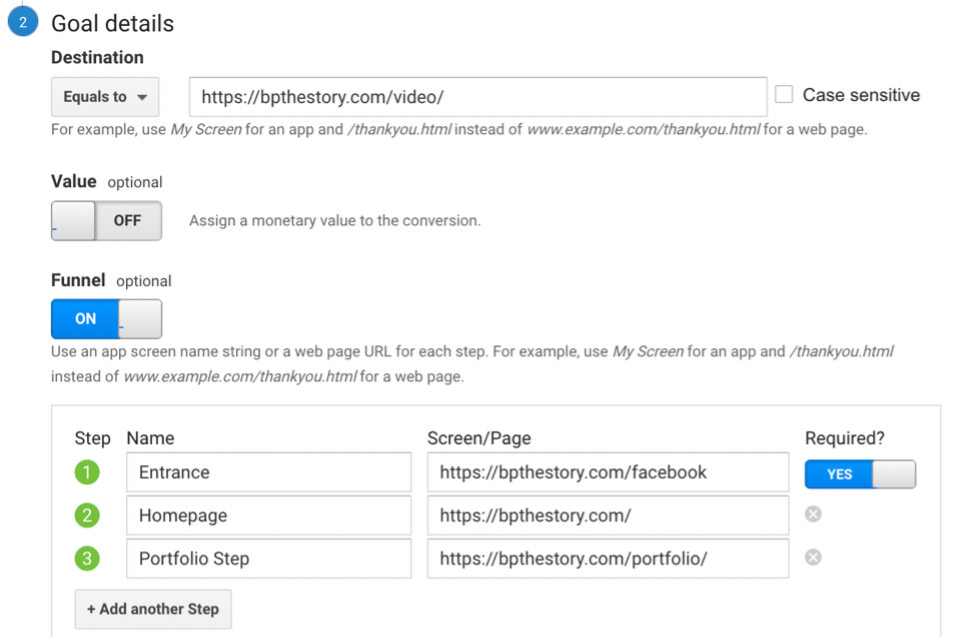
For our example here, the completed goal would look like this.
Verifying your Goal
When you verify your goal, you need to know that someone has traveled the same pathway in the last seven days. If your website has traffic, and these aren’t new pages, it’s likely that someone already has. If these are new pages, go to a browser where you aren’t signed in to the website account and travel the path there. This will give you at least one verifiable series of actions that you can use to confirm that your goal is working.
As this page has existed for some time, we can just go ahead and click “verify this goal.”

Make sure that data makes sense. If you know people have completed the goal but it shows a 0% conversion rate, you’ve made a mistake somewhere.
Using Destination Goals with Attribution
Consider all the possible ways people could accomplish this goal. This website is pretty simple, but here is a breakdown of how someone could find this page.
Now, Google Analytics is going to give you some of this information. You can find referrals, which will tell you how people found your website, under:
Acquisition -> All Traffic -> Referrals.
However, Google Analytics won’t be able to tell you which or how many people came from Facebook and made it to the video page. This is where we can set up funnel options to segment these leads.
When we need to segment leads at the top of the funnel, like they are here, we can use a clever trick to make it possible.
Create a new webpage for each channel that comes to your website, and have that page automatically redirect to the homepage of your website. Assign each a URL like yourwebsite.com/channel. The new user flow should look something like this:
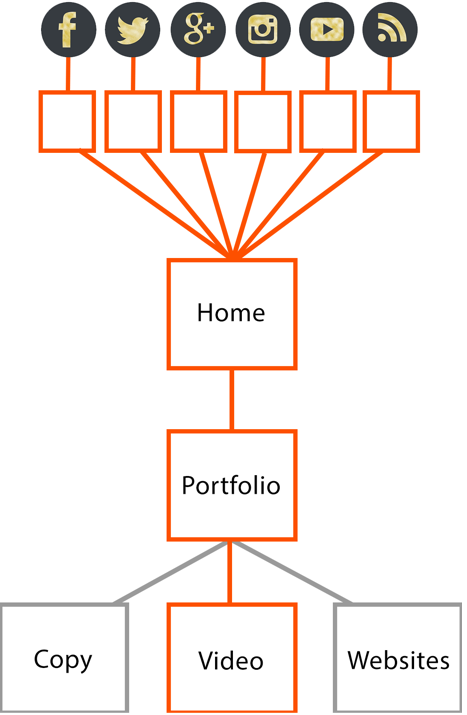
Now you can take the web pages you created and make them at the top of the funnel and create a new goal for each pathway.
Each goal, for each channel you want to collect attribution data for, should be set up like this:
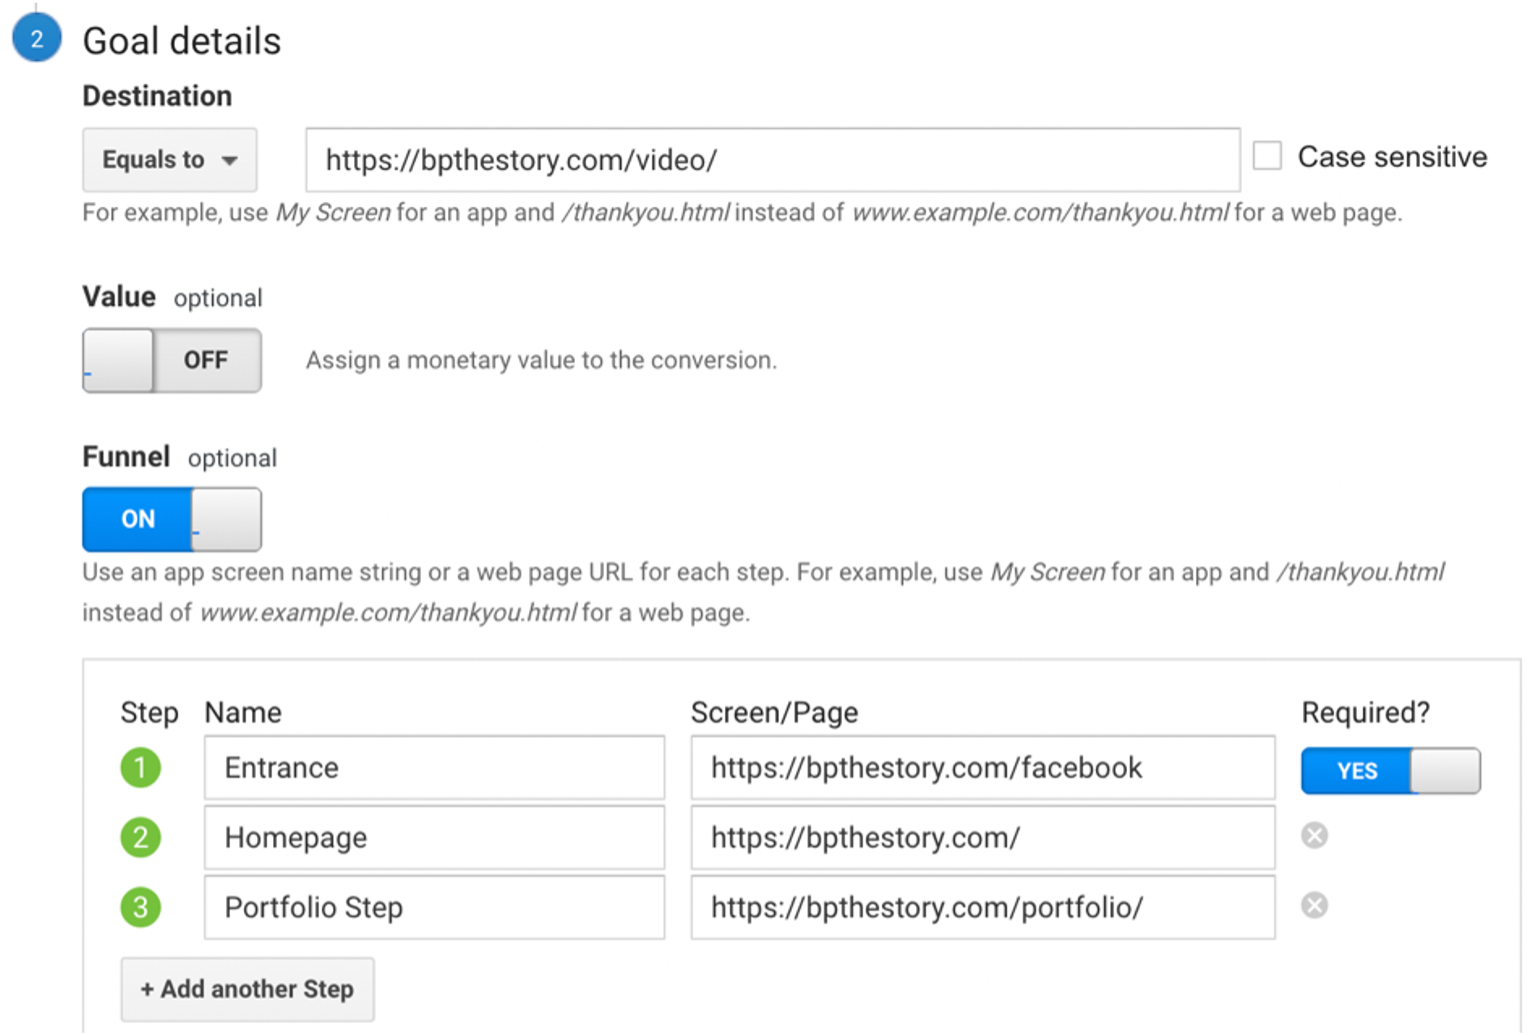
And that’s it!
Google Analytics can be incredibly complicated, and there are mountains to learn. Still, anyone can use destination goals creatively to get actionable data, learn more about your user behavior and figure out where your sales are coming from. Use these simple steps to dip your toe into destination goals in Google Analytics and get some actionable data!